If you’re experiencing stalling or engine light issues, it could be related to a faulty crankshaft position sensor. Don’t delay – replace this component as soon as possible for optimal performance! But then what? After replacing the sensors, make sure to properly reset your car’s computer system so that it can reassess and adjust its settings accordingly.
After replacing the sensor, it’s essential to ensure proper installation and accurate resetting for optimal ECU performance. Taking these two steps will guarantee a successful reboot of your system.
Having difficulty grasping the fundamentals of a certain process? Don’t fret – this article is here to help! It provides comprehensive guidance, so you can master these skills and ensure accuracy.
Steps to Take After Installing a New Crankshaft Sensor
Task #1: Ensure The Proper Installation
After replacing the crankshaft, inadequate installation or incorrect placement of sensors can cause serious issues with your car. Ranging from engine misfires and vibration to late starting and rapid overheating – all indicative signs that a check-up is in order! A quick review of the process will ensure proper sensor replacement has been carried out: it could be what’s standing between you and smooth drives on future journeys.
Step 1:
Take a break from driving – turn off your vehicle and allow the engine to cool before continuing on your journey.
Step 2:
Before attempting to access the crankshaft sensor, remember to first disconnect the negative battery terminal for safety. Depending on your vehicle type, it can be located either at the bottom part of your engine or near its starter motor – check beforehand so you know exactly where it needs replacing!
Step 3:
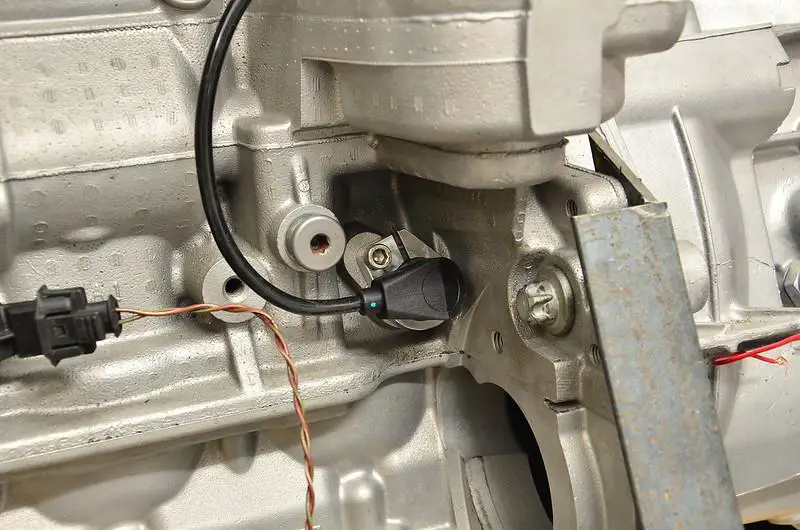
Locate the unit, then use a tool to loosen and remove its retaining bolt. Detach the sensor from either its attachment or housing for complete elimination – employing an extension if necessary. Finally, simply take off the bolt with your fingers!
Step 4:
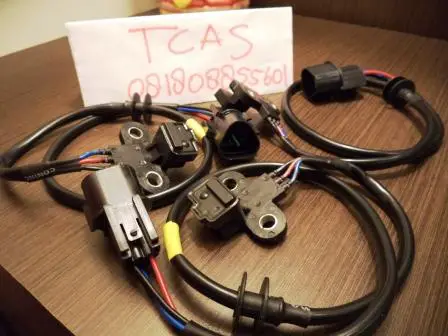
Replacing the sensor is a crucial part of maintaining your engine’s performance. Before starting this process, be sure to soak both the new sensor and its accompanying o-ring in fresh engine oil for maximum efficiency when getting it into place.
Step 5:
You’re almost there! Now, all that’s left to do is install the new sensor and secure it in place with a retaining bolt. Then, take one last step by reconnecting the negative battery terminal before testing out its functionality – you’ll be ready for smooth sailing from here on out!
Task #2: Ensure Installing Crankshaft Right Location
After replacing a crankshaft sensor, it is essential to ensure that everything has been correctly installed. Failing to do so can lead to serious system malfunctions including reduced RPMs, delayed starting times, and poor engine performance. Make sure the right spots have been targeted for optimal performance!
Task #3: Reset the Sensor
Replacing the positioning sensor isn’t enough – resetting is required to ensure optimal performance. This can be done with or without a scanner, and will mostly depend on how familiar you are with using this type of tool. Resetting should always be carried out after replacing the part for maximum efficiency; failure to do so may result in problems starting your car’s engine due to ECU issues until it has been completed. Connecting a scanner provides an easy and speedy way of completing this often-forgotten task!
Task #4: Relearn Crankshaft Sensor
Next thing after resetting the positioning sensor, you need to allow the ECU to detect or relearn its presence or position. To do it, follow the below instructions:
- Start the engine and ensure the engine oil and coolant has at the highest temperature.
- Close the engine for a while so that it cools down.
- Take your scanner and set “CASE Learn” to prepare the sensor for working.
- Take a look at the transmission and check if it is in the park or not. If parked, start the engine.
- Now, press the brakes and hold the pedal tightly.
- After getting the engine to the idle state, check the trouble code.
- You will see whether it indicates the CASE learned or not. If it has been learned, you are done with your job.
Task #5: Ensure car engines receive the necessary information
The ECU links directly to the crankshaft sensor, allowing it to read and adjust engine timings according to speed fluctuations. Malfunctions can occur if this connection is disrupted, so after replacing either the camshaft or crankshaft parts of your car’s motor be sure that accurate information continues to reach its core – otherwise, you may need a new or repaired crankshaft sensor!
Task #6: Check the crankshaft position sensor signal or RPM signal
The crankshaft positioning system is a vital component that ensures your engine runs smoothly. It tells the ECU when to send fuel and ignition timing, allowing for optimal performance from your vehicle’s engine. If you are experiencing any issues with this pivotal piece of equipment, consider checking out the magnetic field or even looking at whether there’s something wrong with its pin – both can cause faults in operation if not functioning properly.
Conclusion
Replacing a crankshaft sensor is a relatively simple job that can be done with basic hand tools. Once the new sensor has been installed, it is important to test the vehicle to make sure it is functioning properly. If the vehicle does not start, it is likely that the new sensor has not been installed correctly or is defective. If the vehicle does start and the engine runs smoothly, then the job is complete and the vehicle is ready to go.
More resources: