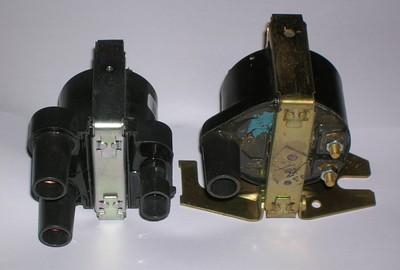
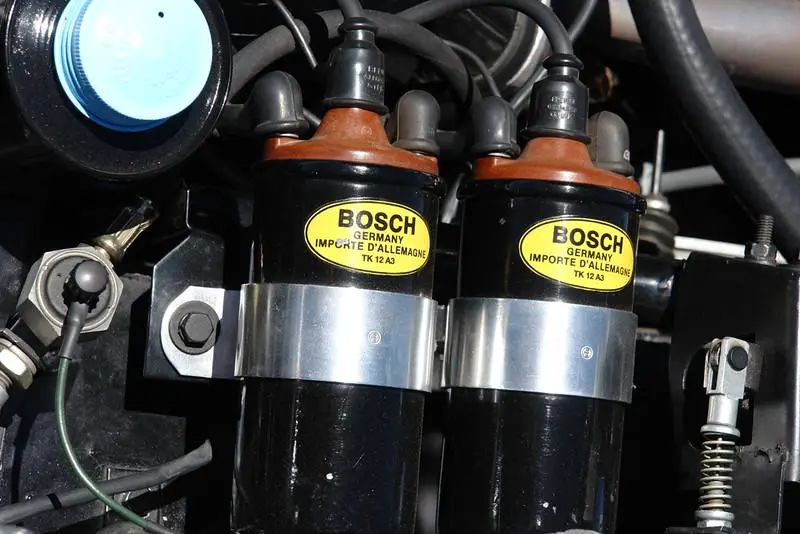
People often rely on multimeters to check whether their ignition coils need replacing. But what if you don’t have a multimeter? No worries! You can still test the ignition coil without one by utilizing an alternate power balance, swapping out old coils for new ones, or even testing with your tongue (albeit not recommended).
With a little bit of preparation and research on the necessary components, you can be ready to dive into testing an ignition coil. Make sure to give it your full attention though; in order for accurate analysis, careful consideration must be taken when examining each part.
Make sure your ignition coil is in good condition. We’ve taken the guesswork out of it with a comprehensive guide to testing without the need for a multimeter. Find out what methods are available and learn how you can quickly determine if yours needs servicing!
Read also: When To Change Ignition Coils?
Symptoms of Faulty Ignition Coils

- Check Engine Light On- The check engine light is a key alert that your engine may be having difficulty. A faulty ignition coil could be the culprit, so contact an experienced Cadillac technician immediately to prevent costly repairs down the road.
- Misfiring Engine- Ignition coil problems can cause your car to cut out unexpectedly while driving, potentially resulting in catastrophic damage. In extreme cases, this misfiring may even affect the catalytic converter and other essential components that keep your vehicle running smoothly.
- Backfiring- If your vehicle begins to emit a loud bang and produce black smoke, it could signal that the ignition coil needs to be replaced. Ignoring this problem can lead to further damage – so make sure you get it checked out right away!
- Loss of Power- If your ignition coil has issues, your car will feel sluggish, and it’ll lose power. The cause of this is the result of abnormal electrical sparks that trigger the engine to burn.
- Jerking and Vibrating- A malfunctioning ignition coil can negatively impact vibrations when the car is idling, as well as the vehicle lurching and jerking forward when you push on the accelerator.
- Spluttering and Coughing Sounds– If you start the engine and hear sputtering and coughing sounds, the ignition coil is the source of the problem. The source of the sounds is a cylinder that does not fire during the ignition process.
- Hard Starts and Stalling- If an ignition coil malfunctions, your vehicle won’t likely be able to start, and may even stall completely while the engine is off. If your car stops when it approaches a complete stop and even if you turn it off, a bad ignition coil could be indicative of a failure.
How To Test Ignition Coil Without Multimeter
Assuming that you have noticed any of the above-mentioned symptoms, your first approach has to be to test the ignition coil properly. For those who don’t have a digital multimeter on hand, we’ve gathered three different methods to test an ignition coil without a multimeter. Check these below and find out which one will be effective for you.
Method-1: Testing Power Balance
The first method we’re going to explain to test an ignition coil pack without a multimeter is the power balance test. Here’s the whole process in detail:
- Gather Necessary tools: As you’re approaching doing a power balance test, keep the following tools on hand:
- Pry tool
- Ratchet set
- Socket
- Screwdriver
- Find Ignition Coil’s Location: Your car’s ignition wiring is easy to reach, often just beneath your vehicle or tucked away within an engine cover. To access it you’ll need a tool and socket set in order to remove any bolts securing the block – then unplugging the corresponding electrical connection should reveal where you can make those essential checks.
- Turn the Engine on Make sure to adhere carefully to your car’s starting protocol, while keeping an eye out for the engine. You’ll need four ignition coils if you have a four-cylinder engine and six if it is a six-cylinder; typically these are split evenly between the front and back with three of each kind. One or the other may be used depending on your vehicle model.
- Examine Every Ignition Coil Separately: To solve your engine issues, you must identify which director, engine, or internal buffer is associated with the symptoms. The best way to do this is by booting into Safe Mode and temporarily disabling its related parts for testing purposes. When all electrical connectors are attached again – pay attention: an increase in RPMs can indicate whether a particular ignition coil isn’t working properly anymore so evaluate them one by one until further problems no longer arise!
Method-2: Coil Swap Method
If you do not have access to a multimeter, you can test your ignition coil another way by swapping its coils. The swapping method is a great means of diagnosing problems with your ignition electric motor yourself, even if you don’t have a practical multimeter.
- Gather Necessary Tools: This method requires just a few simple tools. Here are these:
- Basic screw removal tools
- Digital code reader
- Connect an OBD II Scanner or a Code Reader: Keep an eye out for any potential issues with your car’s ignition coils by plugging in a scanner. An error code of P0350 could indicate individual problems, or even that one coil is defective – the final digit provides more information about what needs to be addressed.
- Detach Coils and Swap Them: To troubleshoot the P0353 error code, lift off your engine hood and disconnect the wiring connected to your ignition coil. Then detach it from its current spot – replace it with another one located either in cylinder number four or of your own choice.
- Erase DTC Codes and Run the Engine: After running the code reader, let your engine idle for a few minutes and review the codes again. If cylinders 4 or 6 are present with misfire errors, deleting this should resolve it. However, if cylinder 3 remains after troubleshooting each ignition coil individually, then you can be sure that its specific coil is defective.
Method 3: Using A Test Light
An effective way to inspect ignition coil packs is to use a testing light. This method can reliably determine whether the packs are good or bad, but won’t be able to accurately distinguish one from another. Let’s discuss the testing procedure itself.
- Gather Necessary Tools: A Cable (One Meter) with a clip, Test light, Safety gloves
- Disconnect the Coil Pack and Remove it: Protect yourself from electric shock when uncoiling a coil pack connector by wearing rubber hand gloves—it’s not an option to ignore! Whether you have a 6-vehicle or V8 wiring harness, the setup will be similar: 3 connectors sending steady signals for headlights and other points of illumination, plus another three switching between those lights. Make sure your safety comes first!
- Connect The Test Light: Test light set up systems that use jumpers or cables take the guesswork out of testing. With a 12-volt battery, attaching a jumper cable with clips simplifies connecting your test lights – perfect for those who have tested before and know what to look for.
- Turn the Engine ON: Ignite the engine and get your motor running! Be careful to maintain awareness during this important process, as it will propel you forward in no time. With a few simple steps, you’ll have yourself ready for whatever is around the bend.
- Inspect All Lines: To check the signal connector, simply touch the test light located on its coil header plug to observe steady or intermittent light. A flickering illumination reveals a consistent source of power whereas regular pulses imply sporadic delivery.
Conclusion
Testing an ignition coil without a multimeter requires some trial and error and a bit of patience. However, with the right tools, you can quickly and safely test an ignition coil and determine if it’s faulty. As long as you pay attention to the process, you can get an accurate reading and know whether you need to replace the coil.
More resources:

